Metrology News recently sat down with Dr. Heike Wenzel, CEO Wenzel Group, for a discussion on the future role of three dimensional coordinate metrology in the new era of smart factories and seamlessly integrated manufacturing processes.
Q: The era of Smart Manufacturing is upon us. How do you see the role of the Coordinate Measuring Machine changing as manufacturing adapts to Quality 4.0?
A: In our view, intelligent manufacturing is characterized – above all – by the flexible use of all available resources and extended utilization of all available data for internal and external communication. As one of the quality leaders producing flexible and very accurate coordinate measuring machines, WENZEL feels very comfortable in the Quality 4.0 space and do see an increasing importance. Our systems help our customers in incoming parts inspection, directly on the shop floor or in measuring rooms. We ensure process stability and enable every level of quality assurance from simple go/no-go checks to deeper analysis of form and positional tolerances. WENZEL CMM’s support first article inspection, SPC control, fast measuring cycles, full part analysis by scanning the whole workpieces and offering comparison data to CAD models. We see a lot of opportunities by the rise of smart manufacturing that demands greater flexibility of all processes, machines and employees involved – our CMM solutions being universal measuring systems support these flexibility requirements.
Q: Measurement sensor technology has witnessed a transition away from tactile to optical over the past decade. Do you see this trend accelerating going forward and how is Wenzel adapting its products to the optical transition?
A: Optical measurement sensor technology has gained traction for applications utilizing coordinate measuring technology in recent years and is continuously growing in importance. We should not underestimate the share that tactile measurement technology still has today and, in our view, will have in the future. At WENZEL are broadly positioned to offer our customers multi-sensor measuring machines that meet their specific requirements. We offer 100% optical solutions such as our MSCAN hand-held scanner or our CORE which is equipped with a proprietary white light sensor and therefore measures contactless and very fast. The lifecycle of a WENZEL CMM can easily span 20-30 Years, so we focus on offering a wide variety of optical sensors for our machines. This enables existing customers to up-grade to optical solutions should they see the need arise. In addition to our own sensors, we cooperate with specialists such as NIKON and KREON to be able to offer our customers a wide selection here. However, we also see that whilst many of customers want to measure very quickly or require high data density – optical systems are predestined for this – many also cannot do without accuracy. By offering the 5-axis measuring system REVO from Renishaw, WENZEL offers an excellent productivity tool that can measure extremely fast, provide great data density and accurately in one solution.
Q: What are the technology limitations of current CMM’s that must be addressed for the CMM to adapt its role in data-driven factories of the future?
A: I don’t see any technological limits right this moment but rather too many isolated solutions regarding data exchange and M2M communication. We need open standards, we need standards that are implemented by all partners in the manufacturing data chain in order to exchange data quickly and securely, but above all, we need interpretation of the available data in a comparable way. WENZEL along with many other partners are working with the VDMA on an industry standard based on OPC UA, which is certainly a first step. This effort will really bear fruit and really excel once industry will no longer allow suppliers to enforce manufacturer standards instead of open standards upon it.
Q: Computed Tomography continues to grow its presence in performing both NDT and dimension inspection of manufactured parts and assemblies. Do you see CT machines starting to erode the role of the traditional CMM. Is CT technology more suited to certain industries? Do you see inline CT inspection becoming more prevalent?
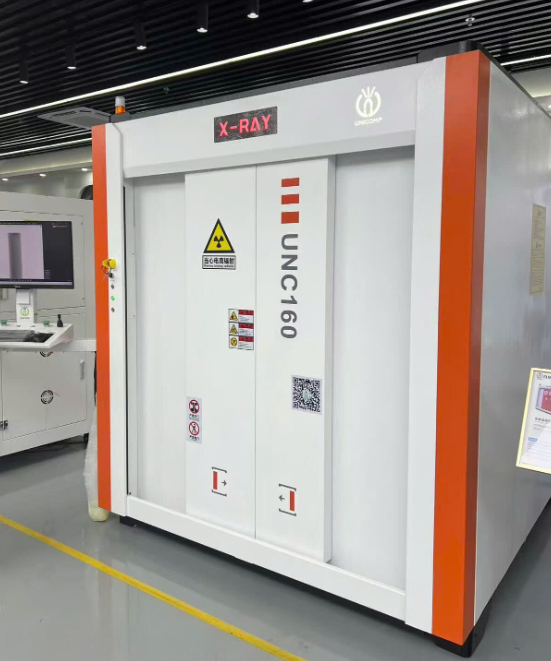
A: Computed tomography has arrived in metrology! That’s a good thing, and it’s been a long road. First and foremost, WENZEL is very happy about industrial 3D CT applications gaining acceptance in the manufacturing world, because we have been working in this field since 2008 and we have come a long way. Our experiences taught us that CTs will not replace the classic CMMs for the most part, but rather complement them in a targeted manner; the focus of the measurement is on the internal structures, where a classic CMM cannot be used at all. In some areas – and especially inline – CT technology is competing with optical measuring cells; in the coming years, we will see which will prevail in which applications. CTs are increasingly being used in all industries, but at present the main focus is certainly on the inspection of plastics, multi-material composites, mission critical components in aerospace and defence, medical technology and parts that have been produced using additive manufacturing methods.
Q: The horizontal arm CMM were once the ‘work-horse’ of automotive sheet-metal inspection. Portable Arms were the first to challenge the horizontal CMM and in more recent years the 6 axis robot equipped with optical sensing has made a further impact. What role do you see the horizontal arm CMM playing in the coming next decade.
A: The area of automotive sheet-metal-inspection has seen many changes in recent years. And yes, many different technologies have evolved and challenged the classical horizontal measuring arms. We are currently seeing a significant increase in demand in the area of horizontal arm CMMs. This current demand is fed both by our traditional customers in that area but especially in the environment of electric car development and production, which shows us that our state-of-the-art horizontal CMMs will have a space also in the future. Here WENZEL horizontal arms often feature combinations of tactile and optical sensors and provide significant accuracy and long-term stability advantages over robot-based solutions. We don’t really see the portable arms as competition here; a portable arm is very well suited for fast and flexible use, but for repeatable verification in a serial production environment there are too many sources of error to rely solely on portable measuring arm data.
Q: Wenzel recently returned to the gear metrology market launching a new range of products and software solutions. What was the driving force behind this business initiative?
A: Giving up the gear business was a concession made during the division of the company between family members. However, WENZEL remained active in the market as a system supplier to Liebherr Gear Technology. Strategically, we never wanted to withdraw from this market, and I am glad to state that we are back. Today WENZEL features a completely renewed hardware and software solution. We are convinced that we have an excellent solution for today’s gear market with our fully integrated and coordinated hardware and software solution. Another motivation was the fact that we can measure and evaluate gears with our entire product portfolio. WENZEL is the only manufacture that can analyse gears on a specialized gear tester but also on “normal” CMMs with or without rotary table and with the use of a computer tomograph.
We really push our teams to provide customer value along all our products and I am proud of the fact that we feature our new GT series not only utilizing the gear software WM | Gear and WM | Gear Analyzer, but also our universal measuring software WM | Quartis for the measurement of other components. A great advantage for our customers!
So technically one could state that the WENZEL gear tester GT series is the first fully certified 3D measuring system for rotationally symmetrical parts. This is another example of how we are trying to create customer value by either horizontal integration – e.g., gear analysis on all machine types or vertical integration the combination of gear and true CMM capability on a gear tester. And all solutions are utilizing the same software platform.
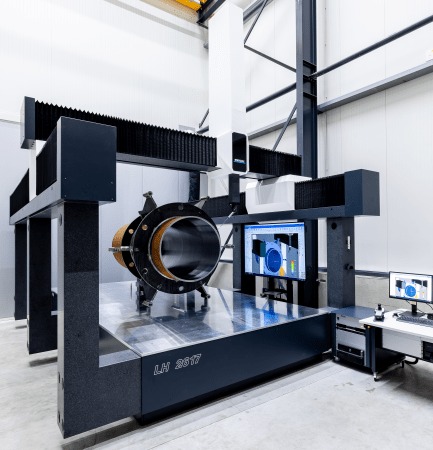 Q: In addition to its portfolio of standard catalogue products Wenzel has the ability to deliver bespoke measuring solutions. Do you see the trend for customized measuring solutions increasing as measuring systems become increasingly integrated into manufacturing?
A: Yes. We feel this every day, and we also implement many very exciting individual, projects here. Particularly in production, the measuring solutions must be synchronized with the processing machines in such a way that the size of the measuring volume fits the components, the measuring time fits the cycle time of the production and, if required, we seamlessly integrate our machines into the customers automation concept. With our very individual possibilities with the “classic” CMMs but also with our specialized machines for the store floor (“SF-series”) WENZEL always finds a suitable answer for the customers’ requirements.
Overall, our high degree of vertical integration is proving to be a major advantage. We can implement flexible solutions better than most of our competitors and are also not impacted by supply bottlenecks, as we produce many parts ourselves, which currently has a very positive effect on delivery times.
Q: We are all working hard to reduce our carbon-footprint. Wenzel remain one of the few CMM builders continuing the tradition of producing all-granite CMMs. How do you view the carbon-footprint of a granite CMM compared to its aluminium structure counterpart?
A: To be honest, we made the decision to build with granite long before the debate about the carbon footprint. We are convinced – and our developers check this again and again at regular intervals with elaborate analyses – that granite still currently offers the best starting point for a flexible, high-precision CMM. WENZEL’s elaborate machining process and process of manual lapping ensures a very high and, above all, long-lasting basic accuracy of our machines. But now to the CO2 footprint: of course, mining and transporting granite also causes CO2 emissions; not least, therefore, we use local granite from there in our production in China, which is geared to the Asian market. But I think it is indisputable that CMMs with aluminium structures leave a much higher CO2 footprint than our CMMs. The overall design of our machines and the accuracy of our lapped guideways allows for our machines to operate with significantly reduced air gaps hence lower air consumption certainly a consideration for customers looking for economic systems that helps them conserve energy as well. Overall, this will certainly be an exciting discussion in the market in the coming years, when metrology customers will have to consider the impact of sourced materials, energy and resource consumption and machinery in their overall impact. We feel very well positioned in this respect.
Q: Wenzel appears unique as one of the few globally present CMM companies that has remained a private family company. What are the principle market challenges you face as CEO as manufacturing comes out of the pandemic era?
A: I took over WENZEL from my father Werner Wenzel. My father was a passionate entrepreneur who always wanted one thing: to build the best quality measuring machines in the world and thus create a long-term partnership with customers. These values – long-lasting quality and partnership- ensure that we cannot always offer the cheapest machines, but if you look at the TCO (total cost of ownership), you can see that it is also worth it for Wenzel’s customers.
We at Wenzel remain true to this passion and, especially as a family business with a very long retention period in our management and highly skilled employees, we succeed very well in communicating these values to all our 600 employees worldwide building on this DNA and executing quality together. The challenge after Corona will be to continue our successful journey and make sure to reach all existing and new potential customers in ways that allow us to demonstrate the special value of WENZEL built CMMs and all other product lines.
Of course, markets are changing; they are changing faster and are becoming more digital. Here, as a medium-sized company, we are faster and more flexible than large competitors in maintaining this ability we are looking forward to the next Years and hope that we can connect to you, the reader of this interview one day to demonstrate our system in real life.

 Q: In addition to its portfolio of standard catalogue products Wenzel has the ability to deliver bespoke measuring solutions. Do you see the trend for customized measuring solutions increasing as measuring systems become increasingly integrated into manufacturing?